03 Wireshark设置解析展示 Vxlan协议
默认情况下Wireshark认为udp 4789端口对应的数据 为Vxlan协议数据包.
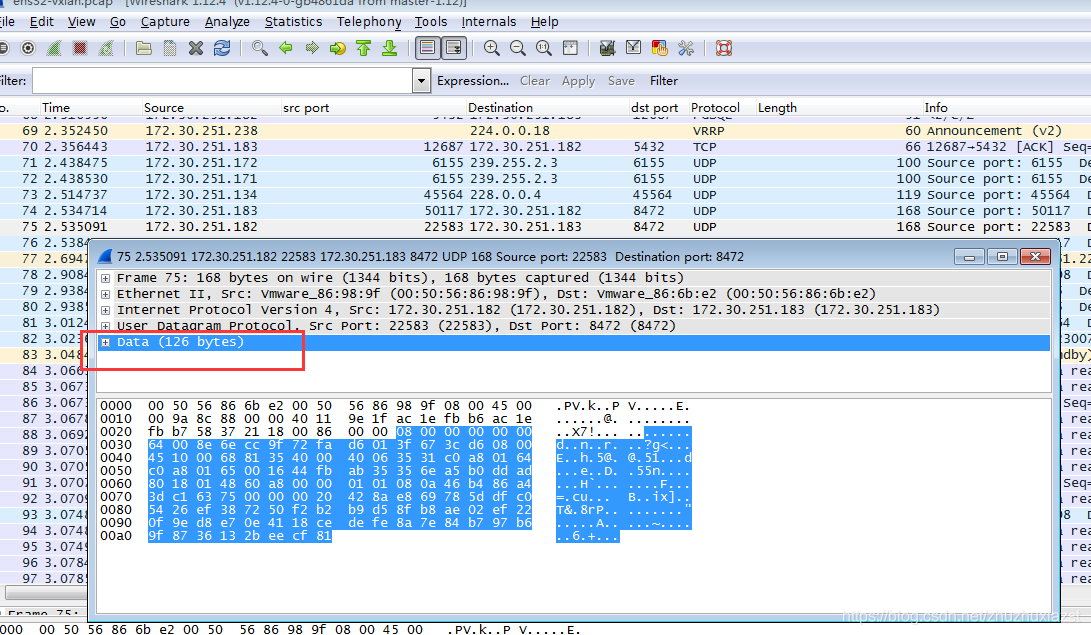
而Linux内核默认的处理vxlan的协议端口为UDP 8472端口,因此在抓包使用wireshark统计观察分析Linux系统下的数据时,不能默认直接解析vxlan协议,而是直接将vxlan协议的数据作为UDP的数据块,可读性不高,因此需要客户化设置将UDP 8472 端口与Vxlan协议对应起来,以便wireshark软件解析协议.
如下图:
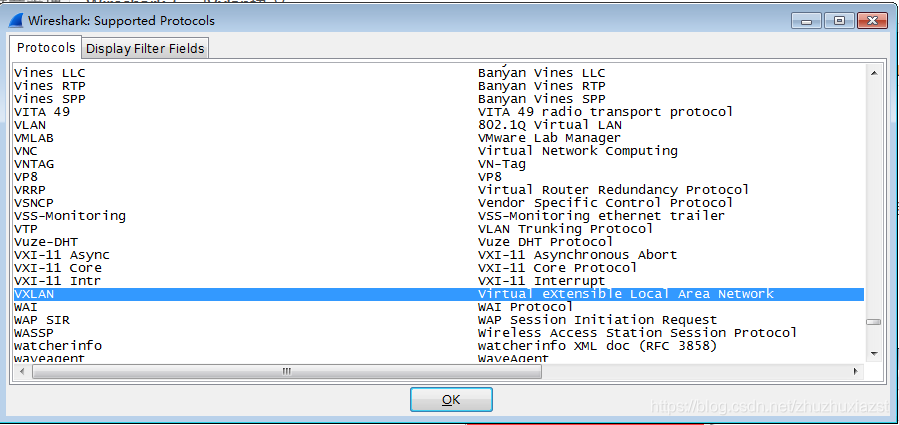
Internals -> Supported Protocols(slow!)->查看对话框中是否有vxlan协议,有的话说明此版本的wireshark已经支持解析vxlan协议,否则不支持,请更新wireshark版本.

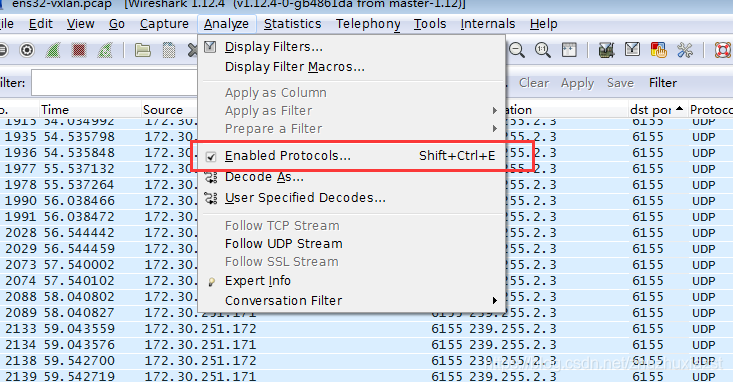
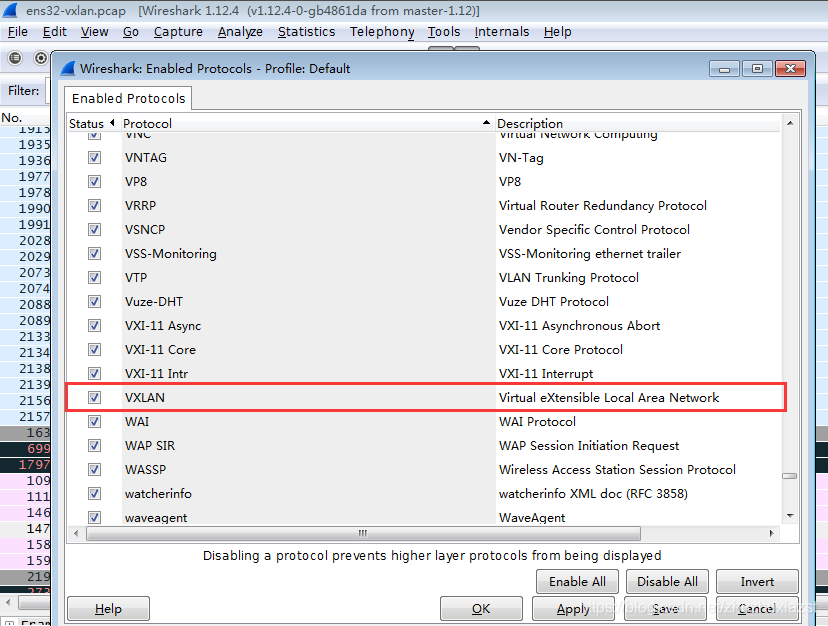
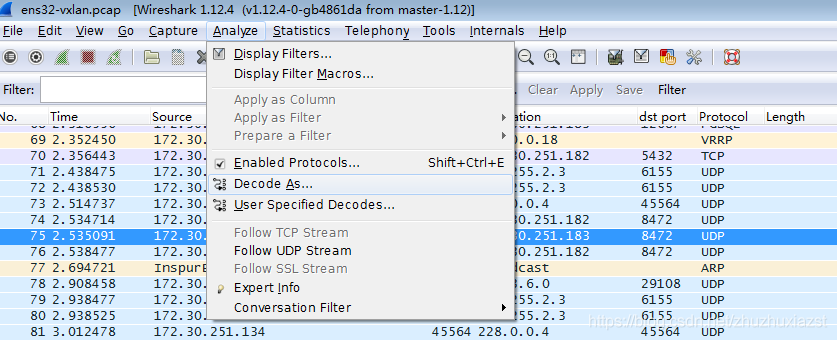
Analyze ->Enabled Protocols->Vxlan
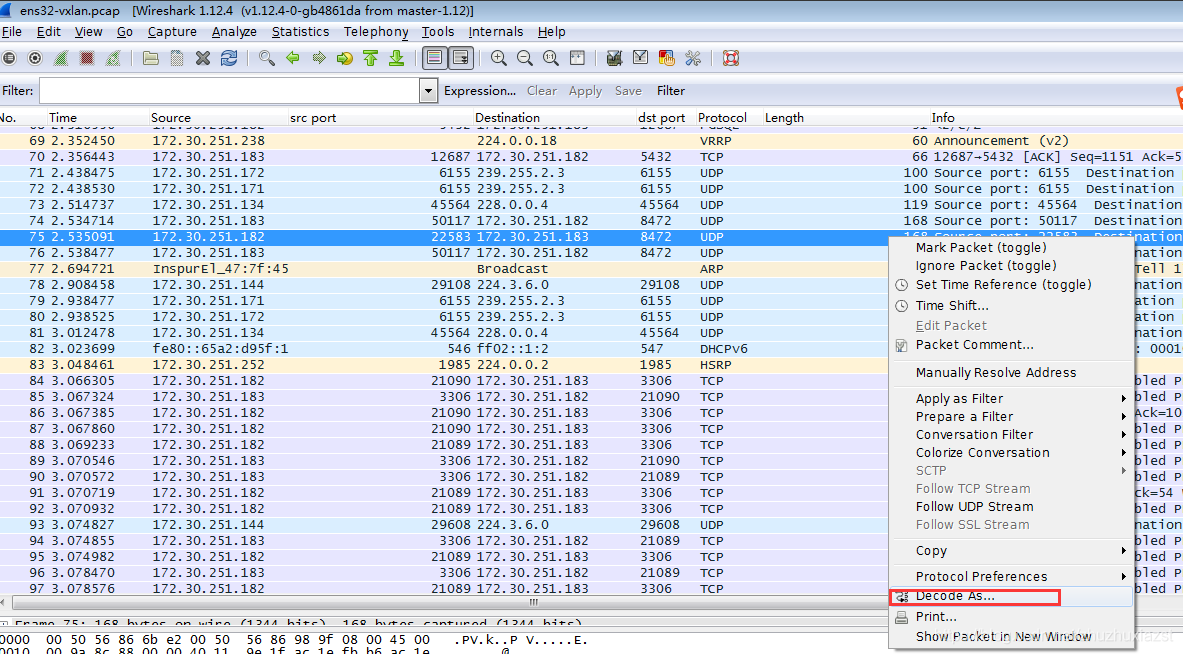
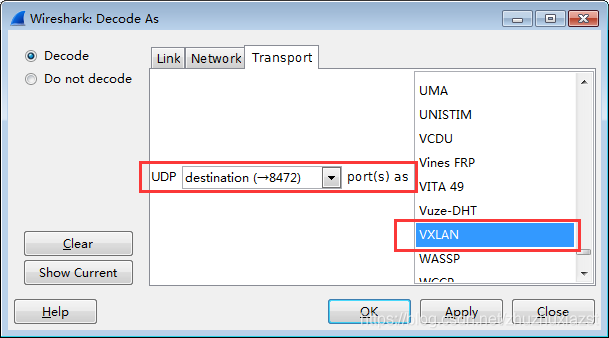
选中 udp 端口8472 的数据包 -> decode as -> UDP (destination 8472) decode as -> VXLAN
或者 选中 udp 端口8472 的数据包 -> (菜单栏) Analyze->Decode as -> UDP (destination 8472) decode as -> VXLAN
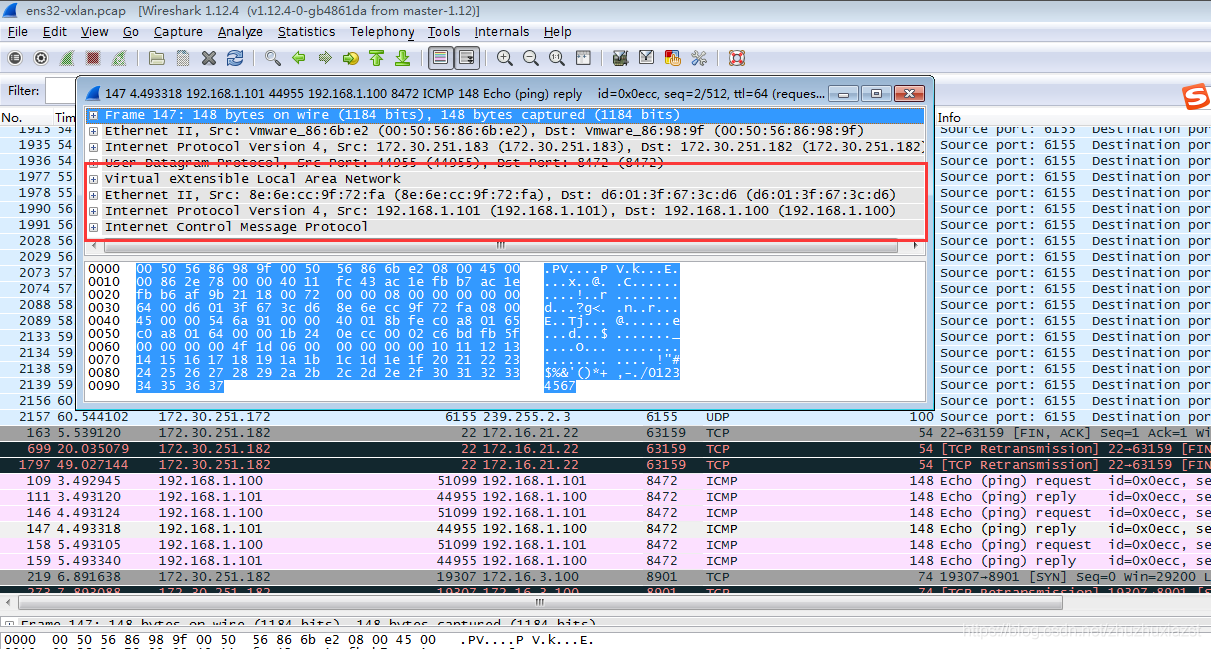
正确解析后数据如下图
说明:
1 其他类似的协议可以类推。
2 文档中介绍的方式只是临时起效,Wireshark软件重启后,配置丢失,应该可以设置用户个性化配置永久保存。
3 参考配置连接 https://www.wireshark.org/docs/wsug_html_chunked/ChCustProtocolDissectionSection.html
———————————————— 版权声明:本文为CSDN博主「AvalonZST」的原创文章,遵循CC 4.0 BY-SA版权协议,转载请附上原文出处链接及本声明。 原文链接:https://blog.csdn.net/zhuzhuxiazst/article/details/112468861
参考连接: