01 Pve单机部署
1、每个节点地位一致,通过每个节点都可以管理整个集群,每个节点安装10分钟左右;
2、具备快速交付的相关功能,比如克隆虚拟机,cloudinit设置虚拟机参数,批量开机、关机,批量VM热迁移;
3、支持CPU超分配和内存超分配(注意单台虚拟机不能超过物理机);
4、超融合,服务器同时完成计算、存储、网络功能,节约硬件成本;
5、结合冗余设计,充足的配件故障容忍,单块硬盘故障不影响虚拟机正常使用;
6、可以存储分级,系统盘使用快速存储池,数据盘使用普通存储池
7、VM支持虚拟化嵌套、支持cloudinit、支持硬件透传(Passthrough)、根据镜像模板进行克隆、链接克隆实现秒级生成、支持备份(手动或策略备份作业)
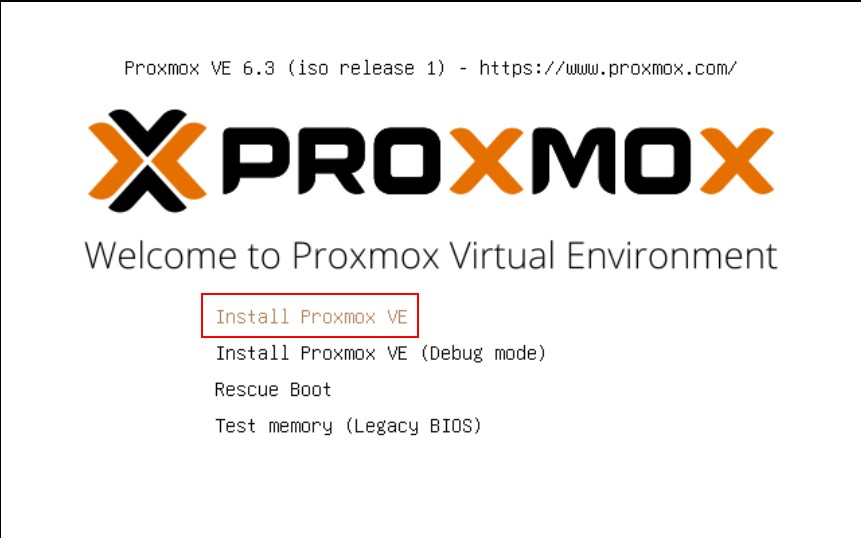
1、选择第一个选项,安装PVE
2、同意协议

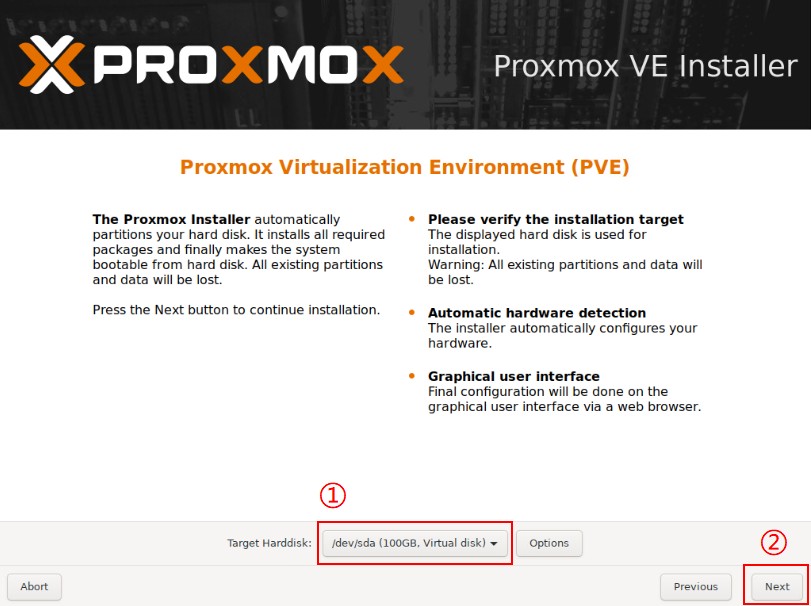
3、选择系统盘
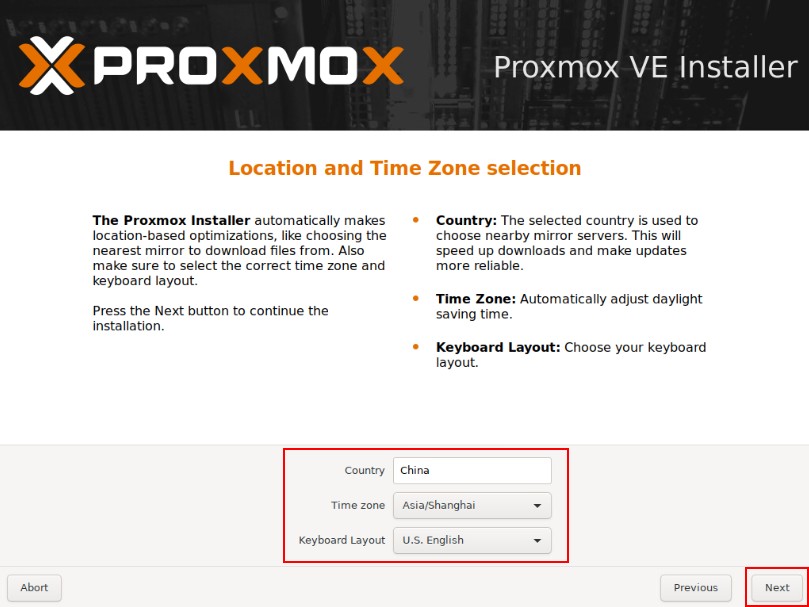
4、配置国家、地区
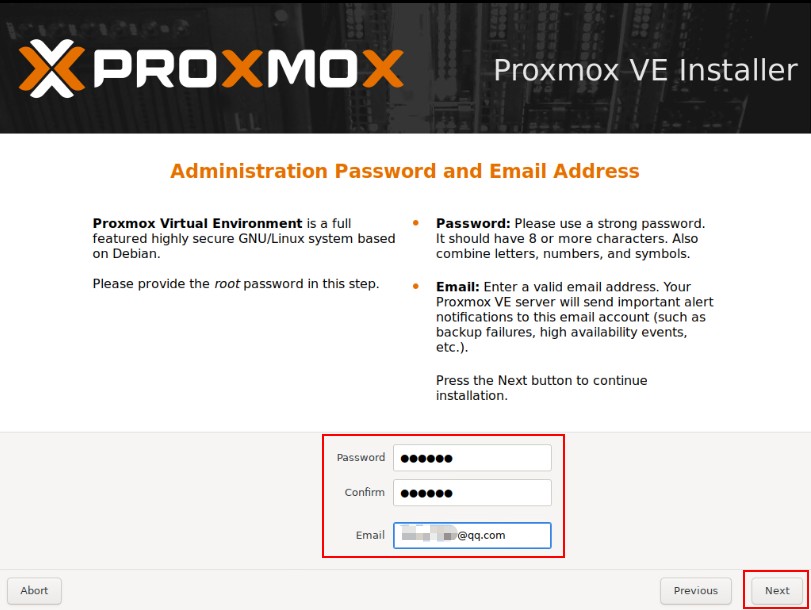
5、配置密码、邮箱 如果为生产环境务必配置为强口令。邮箱建议配置为真实邮箱.
6、配置网卡、主机名、IP地址、DNS等信息
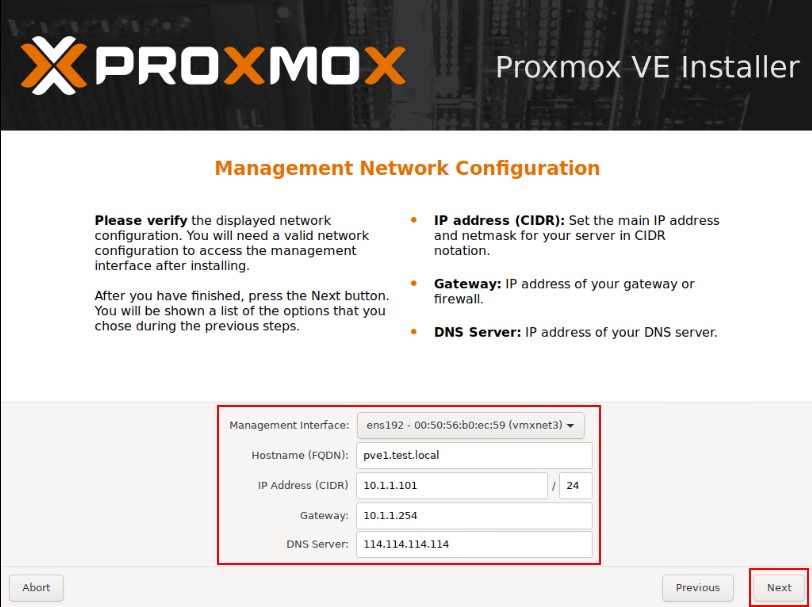
7、检查无误后点击安装。

安装结束后重启,通过浏览器访问,出现以下页面证明安装成功。
地址:https://你的IP地址:8006 用户名:root 密码:为安装时配置的密码。 域:选择Linux PAM
默认安装后,会有“You do not have a valid subscription for this server.”弹窗,可以对其禁用。
vi /usr/share/pve-manager/js/pvemanagerlib.js
#搜索Proxmox.Utils.checked_command(function() {});
找到以下内容,并注释掉:

或直接使用如下命令:
sed -i '/Proxmox.Utils.checked_command(function() {});/d' /usr/share/pve-manager/js/pvemanagerlib.js
1、由于自带的软件源速度较慢,我们换成国内的软件源。登录到控制台进行操作
#删除默认的源,替换为国内源
cat >/etc/apt/sources.list <<EOF
deb http://mirrors.163.com/debian/ buster main non-free contrib
deb http://mirrors.163.com/debian/ buster-updates main non-free contrib
deb http://mirrors.163.com/debian/ buster-backports main non-free contrib
deb-src http://mirrors.163.com/debian/ buster main non-free contrib
deb-src http://mirrors.163.com/debian/ buster-updates main non-free contrib
deb-src http://mirrors.163.com/debian/ buster-backports main non-free contrib
deb http://mirrors.163.com/debian-security/ buster/updates main non-free contrib
deb-src http://mirrors.163.com/debian-security/ buster/updates main non-free contrib
EOF
2、更换pve源为非订阅源
  # 备份默认源
  mv /etc/apt/sources.list.d/pve-enterprise.list ~/pve-enterprise.list.bak
  # 增加非订阅源
  echo 'deb https://mirrors.tuna.tsinghua.edu.cn/proxmox/debian/ buster pve-no-subscriptio'>/etc/apt/sources.list.d/pve-no-subscription.list
3、修改源后,进行更新软件列表
apt update
4、更新PVE至最新版本(此操作会更新所有的软件,按需)
apt upgrade
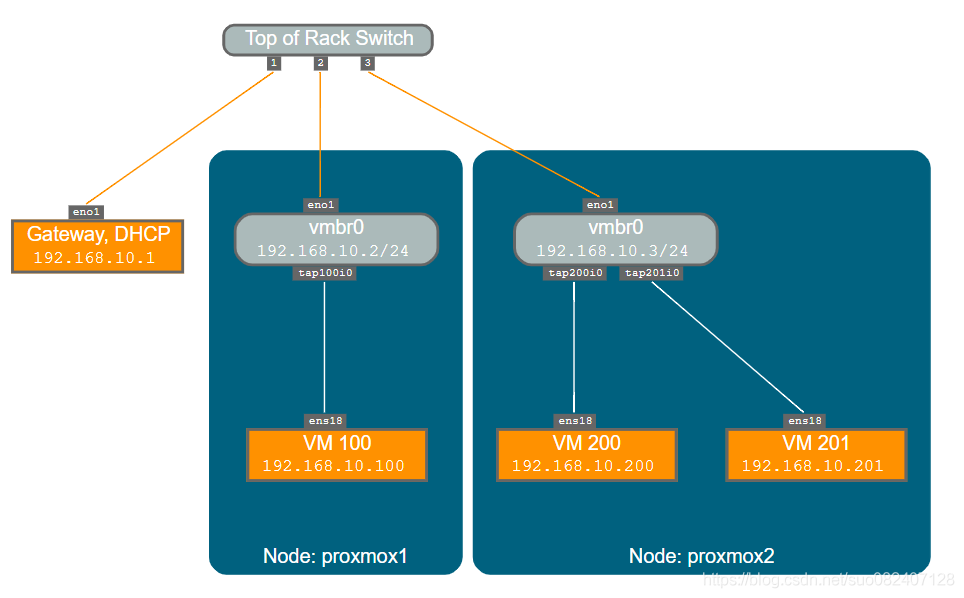
默认创建一个桥接网络。
- 支持桥接网络、BOND、VLAN
- 支持oVS(openvswitch)
- 管理网络、业务网络、集群网络、存储网络可独立组网
通过命令修改/etc/network/interfaces可以修改网卡;如果通过网页端修改ip也可以,但修改是保存在临时文件/etc/network/interfaces.new里,都是重启生效。
auto lo
iface lo inet loopback

iface eno1 inet manual #eno1为物理机网口,请根据自己机器自行修改

auto vmbr0
iface vmbr0 inet static
        address 192.168.10.2
        netmask 255.255.255.0
        gateway 192.168.10.1
        bridge-ports eno1        #桥接的物理机器网口
        bridge-stp off
        bridge-fd 0
auto lo
iface lo inet loopback

auto enp7s0f0.194
iface enp7s0f0.194 inet static
	address 10.110.64.124/24
	gateway 10.110.64.254
	vlan-id 194

iface enp7s0f1 inet manual

auto enp131s0f0
iface enp131s0f0 inet manual

iface enp131s0f1 inet manual

iface enp7s0f0 inet manual

# 仅主机模式
auto vmbr0
iface vmbr0 inet static
	address 172.16.0.1/16
	bridge-ports none  #HOST_ONLY模式下,不桥接任何的物理网卡
	bridge-stp off
	bridge-fd 0
NAT模式是在仅主机模式的基础上,添加SNAT转发规则。
auto lo
iface lo inet loopback

iface enp7s0f0 inet manual

auto enp7s0f0.194
iface enp7s0f0.194 inet static
	address 10.110.64.124/24
	gateway 10.110.64.254
	vlan-id 194

iface enp7s0f1 inet manual

iface enp131s0f1 inet manual

iface enp131s0f0 inet manual

auto vmbr0
iface vmbr0 inet static
	address 172.16.0.1/16
	bridge-ports none
	bridge-stp off
	bridge-fd 0
	post-up echo 1 > /proc/sys/net/ipv4/ip_forward
	post-up iptables -t nat -A POSTROUTING -s '172.16.0.0/16' -o enp7s0f0.194 -j MASQUERADE
	post-down iptables -t nat -D POSTROUTING -s '172.16.0.0/16' -o enp7s0f0.194 -j MASQUERADE
iptables规则中-o指定可以访问外网的网卡,本里中为enp7s0f0.194。此外,必须开启ip内核转发。
此时,外部无法访问虚机,如果想访问虚机,需要做DNAT,例如:
iptables -t nat -A PREROUTING -i enp7s0f0.194 -p tcp –dport 2233 -j DNAT –to-destination 172.16.0.186:22
如果不生效,请查看是否被iptables的规则DROP掉了。iptables -S|grep DROP 尤其是FORWARD链: iptables -S FORWARD;如果FORWARD链的默认规则是DROP,则需要添加放通规则:iptables -A FORWARD -i vmbr0 -j ACCEPT
HOST模式和NAT模式下,需要在PVE内部搭建DHCP服务器,以便在启动虚拟机时,动态获取网络配置(IP,网关等)。
[root@OS-network-1 ~]# apt install -y dnsmasq

# 宿主机修改dnsmasq的配置文件
[root@OS-network-1 ~]# cat > /etc/dnsmasq.d/netns.conf <<EOF
#DNS服务器的地址,就vmbr0的IP 。默认监听所有地址
listen-address=172.16.0.1
#设置上游DNS服务器的地址
server=114.114.114.144
#设置DHCP分配的地址范围和时间
dhcp-range=172.16.0.10,172.16.0.200,1h
#设定网关的地址:dnsmasq具体的option,可以通过dnsmasq --help dhcp查看
dhcp-option=3,172.16.0.1
#设定DNS服务器
dhcp-option=option:dns-server,114.114.114.114,8.8.4.4
EOF
#启动dnsmasq
[root@OS-network-1 ~]# systemctl restart dnsmasq
#或:
# dnsmasq --conf-file=/etc/dnsmasq.d/netns.conf
参考连接:
https://zhuanlan.zhihu.com/p/352355271
https://blog.csdn.net/sinadrew/article/details/85040231
https://blog.csdn.net/suo082407128/article/details/111880608
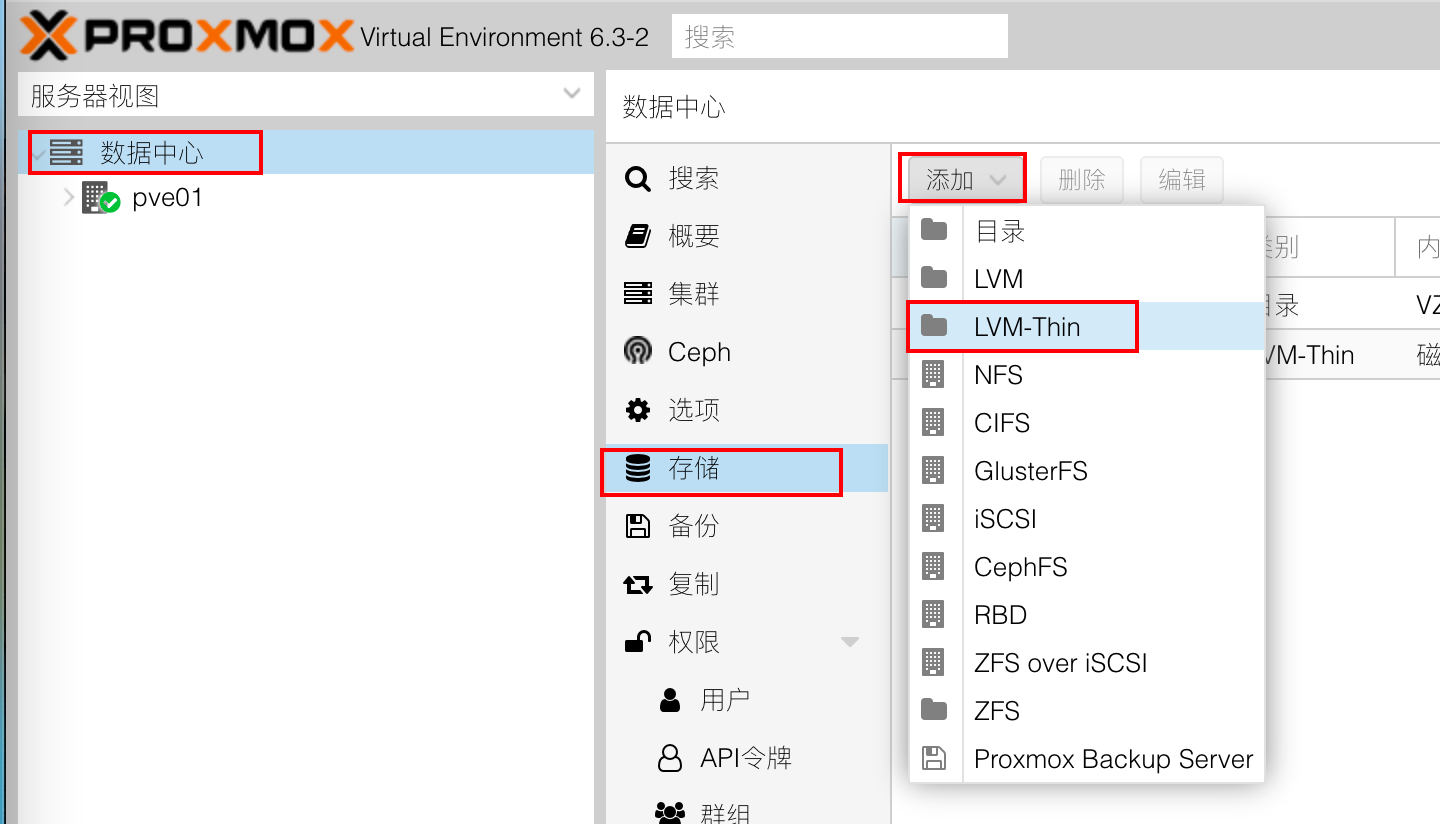
pve支持丰富的存储,默认使用LVM-Thin作为磁盘映像,使用目录作为备份文件、模板文件的存储。
集成支持ceph存储
支持各类存储,包括:LVM,LVM-Thin,iSCSI/内核,iSCSI/libiscsi, Ceph/RBD, CephFs, ZFS over iSCSl, ZFS(本地),目录,NFS,CIFS,GlusterFS等
推荐使用ceph存储作为共享存储。
1、准备精简lv
pvcreate /dev/sda /dev/sdb
vgcreate vgdata /dev/sda /dev/sdb

# 创建精简lv
lvcreate -l +100%FREE -T -n vmstore vgdata
2、将精简lv加入到pve存储
选择“数据中心”(这块一定要注意,不是选择PVE),存储 - 添加
对于任何一个虚拟化平台,总有一个客户机软件和宿主机通信,例如vmware的vmtools。KVM下的就是qemu-guest-agent。因为PVE是基于KVM的,所以客户端依旧是 qemu-guest-agent 。
Linux虚机
#for rehat
yum  install qemu-guest-agent -y
#for debian
apt install qemu-guest-agent -y
Windows虚机
直接使用virtio驱动光盘安装。如果是win7/xp需要手动进入光盘,找到agent目录,选择32位和64位就行
启用:
安装完成之后,在“虚拟机”-“选项”里,勾选 QEMU Guest Agent
https://pve.proxmox.com/wiki/Web_Interface_Via_Nginx_Proxy
root@pve01:/etc/nginx/conf.d# cat proxmox.conf
upstream proxmox {
    ip_hash;  #否则vnc使用过程中会出现问题
    server 192.168.1.10:8006;
    server 192.168.1.11:8006;
    server 192.168.1.12:8006;
    server 192.168.1.13:8006;
    server 192.168.1.14:8006;
}

server {
    listen 80 default_server;
    rewrite ^(.*) https://$host$1 permanent;
}

server {
    listen 443;
    server_name _;
    ssl on;
    ssl_certificate /etc/pve/local/pve-ssl.pem;
    ssl_certificate_key /etc/pve/local/pve-ssl.key;
    proxy_redirect off;
    location / {
        proxy_http_version 1.1;
        proxy_set_header Upgrade $http_upgrade;
        proxy_set_header Connection "upgrade";
        proxy_pass https://proxmox;
        proxy_buffering off;
        client_max_body_size 0;
        proxy_connect_timeout  3600s;
        proxy_read_timeout  3600s;
        proxy_send_timeout  3600s;
        send_timeout  3600s;
    }
}
https://pve-doc-cn.readthedocs.io/zh_CN/latest/introduce/index.html